Voice Over IP (VoIP) Adapter
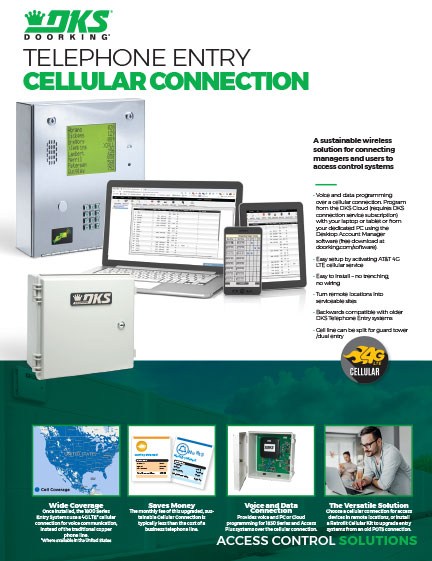
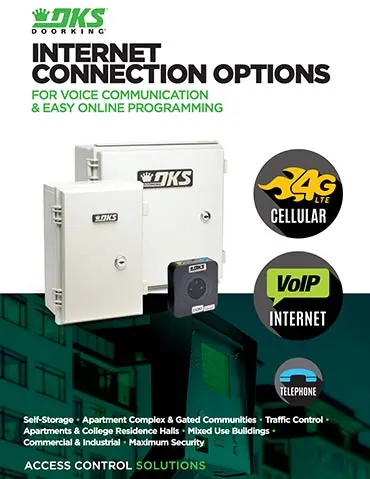
Provide Internet connectivity for System Programming and/or Voice Communication to eVolve Series, 1830 Series, Access Plus, and Standard/1812 Series Entry Systems. Our customers choose a VoIP connection option if they have an ethernet connection convenient to the Entry System location. VoIP Retrofit is also a great option for those currently using a POTS connection. For a turnkey Easy Connect internet option: a VoIP connection powered by the DKS Internet Service subscription is the plug-and-play solution.
Looking for help with a different product? Start by choosing the product category below:
Tech Support Downloads
Are you brand new to your DKS Voice-Over-IP telephone service?
Follow the easy steps below to activate your Internet Connection.
Step 1. Choose Plug & Play or Manual IP Configuration
Internet Connection (Plug & Play)
- Voice and Programming (wired connections)
- DKS Internet Option™ (subscription-based service)
- Requires 1830-186 Network Adapter for data
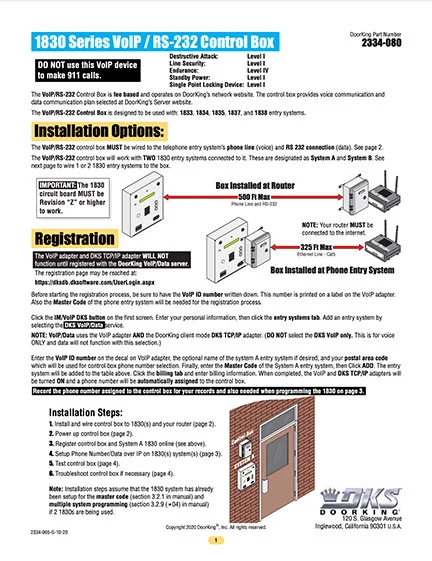
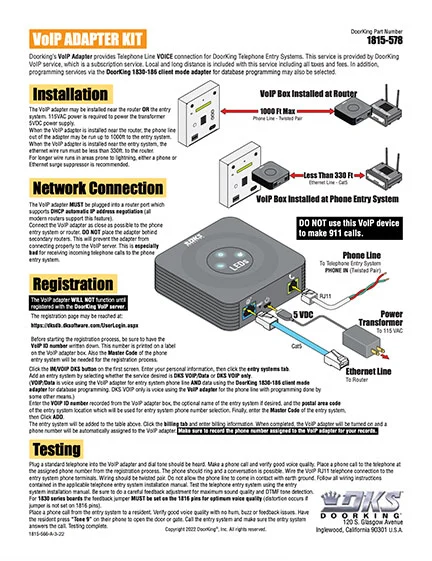
- Requires 1815-578 VoIP adapter for voice or use the 2334-080 for 1830 Series systems or the 2334-081 for Access Plus systems. The 2334 combines the network adapter and the VoIP adapter into a single system to simplify installation. IMPORTANT: When using the 2334-080 with 1830 Series systems, the 1830 circuit board MUST be REV Z or higher.
- These options are Plug & Play for LAN and WAN connections using the DKS Internet subscription service
Internet Connection (Manual IP Configuration)
- Voice and Programming (wired connections)
- Manual setup – requires 1830-185 Network adapter
- Manual setup required: determine Default Gateway, set your IP address, setup Port Forwarding, configure Firewall for access, order Static IP address from internet provider or setup DDNS host account
- VoIP provider subscription service & hardware required for voice
Step 2. Begin Activation
- Voice & Data Service for 1830 Series Entry Systems
- Voice Only Service for all DKS Entry Systems
- Plug & Play Internet Programming
Step 3. Connection via INTERNET or via LAN
- To set up a DKS Doorking VoIP internet connection, you need to install a dedicated DKS VoIP adapter on your Doorking entry system, activate a DKS VoIP account, and then connect the adapter to your router, which will provide plug-and-play internet connectivity for your entry system; essentially, you just need to plug in the adapter, configure the settings through your DKS account, and then connect a phone to the adapter to test the voice functionality; most modern Doorking systems can be retrofitted to use VoIP with this adapter
- To set up a DKS Doorking VoIP internet connection, you need to connect a dedicated VoIP adapter to your router’s LAN port, then configure the settings on the Doorking entry system to use the VoIP service, including entering the provided credentials like the VoIP ID and access details; for a LAN connection, simply connect the entry system’s network adapter directly to your router’s LAN port and configure the IP address on the entry system to match your network settings.
Obtain a VoIP adapter:
If your DoorKing entry system doesn’t have built-in VoIP capability, purchase a dedicated VoIP adapter compatible with your system.
Connect to the router:
Plug the ethernet cable from the VoIP adapter into an available LAN port on your router.
Power up the adapter:
Connect the power supply to the VoIP adapter and turn it on.
Access the entry system settings:
Use the programming keypad on your DoorKing entry system to access network settings.
Enter VoIP details:
In the network settings, select the “VoIP” option and enter the necessary information provided by your VoIP service provider, including the server address, username, and password.
Configure network settings (if needed):
Depending on your system, you may need to manually set the IP address, subnet mask, and default gateway on the entry system to match your network.
Register the system:
Once the network settings are configured, register your DoorKing entry system with your VoIP provider.
For a LAN connection:
Connect directly to router:
If your DoorKing entry system has a built-in network adapter, connect it directly to your router’s LAN port using an ethernet cable.
Set IP address:
Access the entry system settings and manually set the IP address, subnet mask, and default gateway to match your network configuration.

Step 4. Existing Account Login
If you have already activated your device you can log in here.
SOFTWARE VIDEOS
Literature
Planning
DoorKing is a registered Continuing Education System provider for the American Institute of Architects.
DKS offers comprehensive help with System design considerations and equipment layouts. We offer assistance whether your application calls for complex Access Control Systems, or just a single door or automated vehicular gate-controlled entry point.
SYSTEM PLANNING CONSULTATION
DKS assists Architects, Engineers, and Consulting Specifiers with CAD drawings, System planning, and 3-part specifications. We will be happy to assist with design and layout parameters for your automated Vehicular Gate and Access Control System requirements. For assistance, please contact George M. Hendrix, Business Development Manager at 678-230-4162 or email George.
LUNCH & LEARN SESSIONS
To schedule a Lunch & Learn (webinar or in-person) on Automated Vehicular Gate design guidelines that help prevent accidents and injury, and to be sure your design is in compliance with industry safety standards and International Building Codes, please contact Allen Wright, Business Development Manager at 310-489-4875 or email Allen.
As well as having downloadable information on each specific product, we have collected all our download files click the button below to access all downloads in one location.